Last month HPE released VM Essentials 8.0.8 (given that I’ve been lazy over the summer, 8.0.9 is already available however as I write this) with built in support for migrating VMs from VMware to VME! One of the prerequisites for a successful migration is to inject the Virtio drivers in the VMware VM before starting the migration process. This is not just as simple as mounting the virtio-win-0.1.271 iso image in the VM and double clicking the virtio-win-gt-x64.msi to install it. You actually need to inject the drivers offline to properly accomplish this. And I’m going to show you here how to do that.
And as always before I begin:
Use any tips, tricks, or scripts I post at your own risk.
First you will want to extract the .iso image somewhere (I will be using C:\VME\virtio-win-0.1.271 here) with 7-Zip (I am going to assume you already have this .iso downloaded, if not you can find the latest version here). If you look at the contents of the .iso, you’ll find it includes drivers for many Windows OS versions including XP, W7, W8, W10, W11, plus all the server versions from 2003 to 2025.
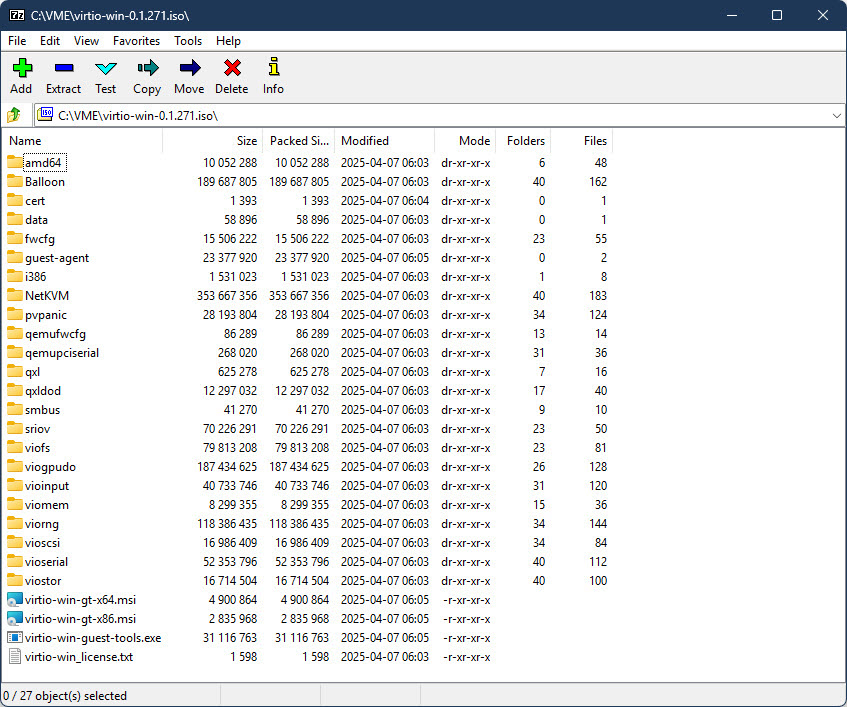

If you are going to migrate a Windows Server 2022 VM (which is what I’m using as my OS for this post), you probably don’t want to inject the drivers for Windows XP! Now if you are energetic, you could just go manually delete all those OS folders in each driver class, or manually just pick out the drivers you want. I’m not energetic however, and I prefer to work smarter not harder (some might call it lazier though) so I use PowerShell to only give me the drivers I actually need.
Open a PowerShell prompt and paste the following commands:
$ParentPath = "C:\VME\virtio-win-0.1.271"
$FolderToKeep = "2k22"
Get-ChildItem -Path $ParentPath -Directory | Select Name | Foreach {
$Name = $_.name
$ParentFolder = $ParentPath + "\" + $Name
Get-ChildItem -Path $ParentFolder -Directory -Exclude $FolderToKeep | Remove-Item -Recurse -Force
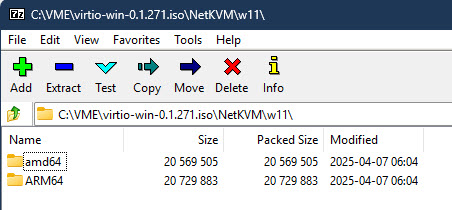
}In the example above, Get-ChildItem will go through every top level folder inside of C:\VME\virtio-win-0.1.271 and delete any folder not named 2k22, leaving you with just the drivers for Windows Server 2022. I then like to rename C:\VME\virtio-win-0.1.271 to WIN2022_VIRTIO_DRIVERS (just makes it easier to differentiate for the OS, obviously I replace the Windows version as required in the folder name). As I am constantly building new images and will have a multitude of different OSes for migration, I went ahead and repeated the above steps until I had separate folders for W10, W11, W2016, W2019, W2022, and W2025. One thing to note is that for W11, the drivers are further divided into AMD64 and ARM64 folders under the W11 folder. This is where I became lazy and just manually deleted the ARM64 folders as I don’t expect to ever need them and I only wanted the AMD64 drivers for W11.
At this point, I recommend you go into the WIN2022_VIRTIO_DRIVERS folder and removed the x86 .msi file and also manually removed the i386 folder out of the root (it has W10 x86 drivers in it). And remove the i386 .msi in the guest-agent folder (you aren’t going to need these unless you are running a 32 bit Windows instance).
Since you are going to be copying WIN2022_VIRTIO_DRIVERS to every Windows 2022 Server VM you are going to migrate I also recommend you drop a copy of the PowerShell script to remove VMware Tools into this folder too, which you will run after the migration process. Here’s a link to the script I have been using to remove VMware Tools after migration: https://gist.github.com/broestls/f872872a00acee2fca02017160840624 (thank you Sean Broestl for creating this script)
Now copy WIN2022_VIRTIO_DRIVERS to C:\ in the Windows 2022 Server VM that you want to migrate to VME.

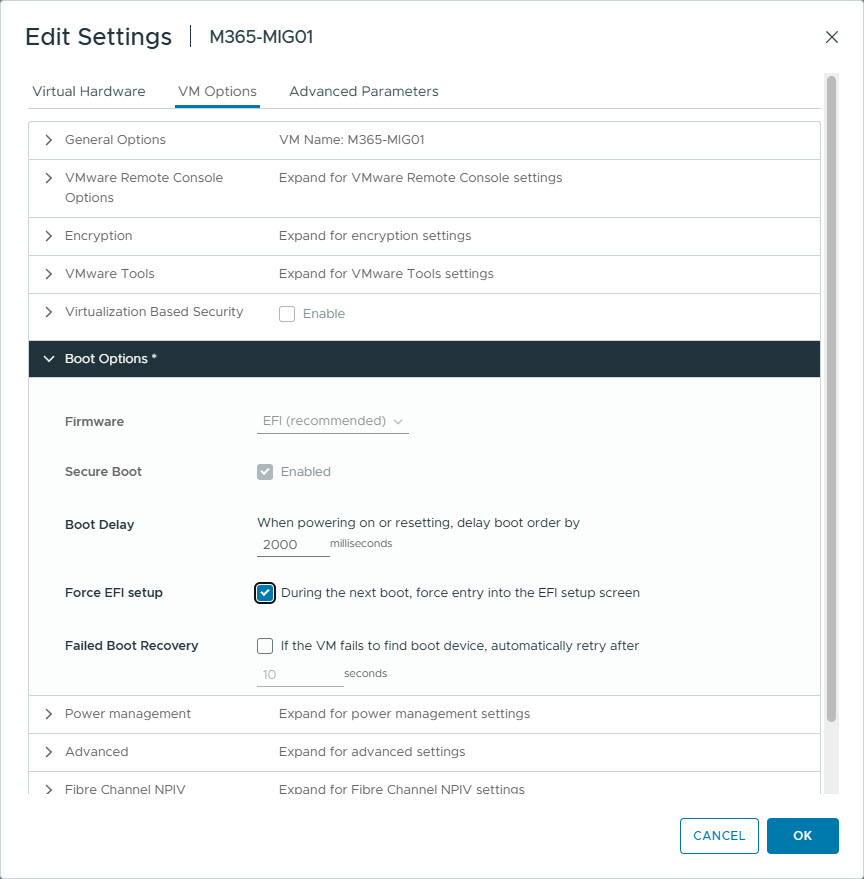
Connect to the VMware Remote Console of that VM and attach the Windows Server 2022 .iso to it. Now edit the VM to force it to boot to UEFI setup (so you can select the .iso to boot from), and reboot the VM.

Once at the UEFI boot menu, select the CD drive and wait for the Windows 2022 Server setup to start.

Once at the Setup Welcome screen, and within the VMware Remote Console, press SHIFT + F10 to open a command prompt and verify you can see the C: drive (including the WIN2022_VIRTIO_DRIVERS folder). If necessary scroll through all the drive letters until you find it and substitute C: for that drive letter for the next step. If you do not see your drive, then you probably need to inject the VMware SCSI drivers into your .iso image (which is a totally different blog post).
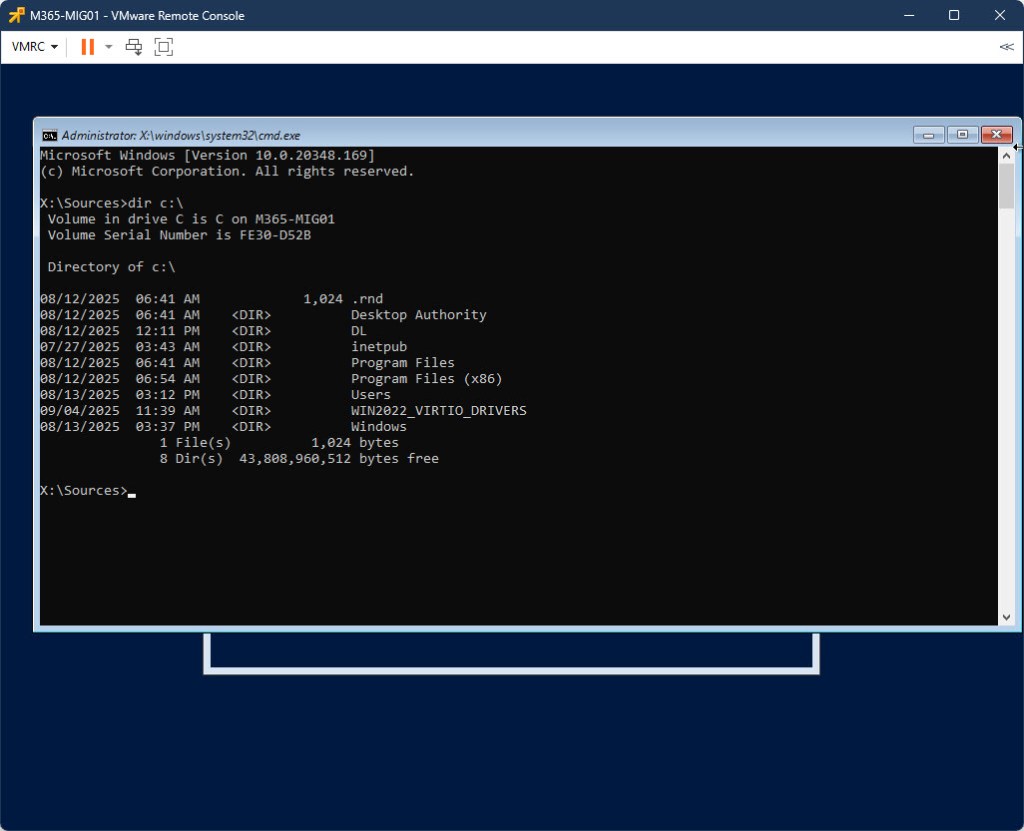
Now inject the drivers into C:\Windows using the following command:
dism /image:c:\ /add-driver /driver:c:\WIN2022_VIRTIO_DRIVERS /recurse
You can safely ignore any “Error 50” messages (if you see any) – it’s not relevant to this process. Once the drivers have been added, reboot the VM with the following command:
wpeutil rebootOnce back in Windows, install C:\WIN2022_VIRTIO_DRIVERS\virtio-win-gt-x64.msi and reboot again.

Do not bother running C:\WIN2022_VIRTIO_DRIVERS\virtio-win-guest-tools.exe yet – it will fail to install because the hypervisor is still VMware.
Make sure you disconnect the .iso image from the VM before continuing. At this point – your VM is ready for migration. I will be covering the actual migration process in a different post, however the follow up steps related to this post are below.
Once you have migrated your virtual machine from VMware to VME, log back into the VM. VMware Tools will mostly crash on login. Ignore this for a moment and run C:\WIN2022_VIRTIO_DRIVERS\virtio-win-guest-tools.exe. Once that is done, open PowerShell and run C:\WIN2022_VIRTIO_DRIVERS\Remove_VMwareTools.ps1. Reboot when the script finishes, and you should now have a working VM migrated from VMware to VME!

You must be logged in to post a comment.